Pages

Showing posts with label DIY. Show all posts

12.06.2012

Christmas Advent Calendar: Day 6

Hang mistletoe, real or made out of felt, like the one below.

11.01.2012

Autumn-Themed Outdoor Dinner Party

Husband Franco & Me

I've wanted to start monthly, rotating, themed dinner parties with some friends for a while now, but never took the initiative to plan one. Finally, while talking about it with my friend Nichole in August, I committed to host the first one at the end of September. I designed invitations, letting the elegant gold script font set the tone for the rest of the party. Nichole and I pinterest-ed our ideas and put them all together at what I call a dinner party success!

 The conversation was lively. The food was delicious. The night was magical. We caught up with old friends, and made new ones. It was a night to remember and I look forward to repeating it!

Dinner Party Details:

Invitations
      Designed by me.

Where
      Right outside our triplex building in our long cement driveway. It was a perfect location for it since it was close to our front door--to ferry the warm food in and out--and the weather was just right. (I wish we had thought to remove the trash cans so they wouldn't be in the background of the top picture...)

Decor:
      I rented the white folding chairs and two white rectangle tablecloths from one of the many inexpensive party rental places here in Pomona. We used two folding tables and put them together to form one long table. Everything else on the table came from my party decoration collection, from the milk glass vases to the mason jars to the bamboo place mats my friend brought me from Thailand. Nichole put the finishing touches by adding the bejeweled napkin rings, the "Love" tags on the jars, the battery-powered candles, and the pine cones. I bought the plates, flatware, and napkins from Target. The stripey straws are from Garnish.

Centerpieces: The big bouquet of flowers is from Trader Joe's. I grouped different colorful vegetables for the other centerpieces, a less expensive and useful alternative to flowers. And I got to cook with them afterwards.

Food:
    appetizers // 
      -amazing bruschetta (by Nichole)
      -greek olives
      -brie & crackers garnished with fresh figs
      -ham
    drinks //
      -Izze sodas
      -homemade lemonade
    main dishes //
      -rosemary & thyme roasted chicken
      -roasted fingerling potatoes
      -steamed haricot verts
      -strawberry spinach salad with vinaigrette (by Nichole)
    dessert //
      -strawberry popovers (prepared by Kristen)
      -ice cream cones (by Mike & Nichole)


all food was prepared by me, with help from the other guests. for most of the recipes, see my pinterest board "dinner parties."

*Thank you, Mike & Nichole, Joel & Kristen, Levi & Andy, and Franco for coming and helping out! Hope you had as much fun as we did. xo

2.16.2012

Rewind: Carnival Quinceañera, Part 2, The Guests

In the next little while, I will be "rewinding" a bit to post about events which occurred in the past year or so.
--------------------------------------------------------
Rewind: Carnival Quinceañera, Part 2
July 2, 2011 


I'm back to share a few more pictures of Ruth's Quinceañera! The last post was about the decorations at the Carnival Quinceañera, which you can see here. Besides food, decorations, and a pretty dress, a traditional Quinceañera also includes a dance. More like a waltz, actually. And since girls can't waltz by themselves, they need partners, or chambelanes! Ruth's friend Spencer was her chambelan. Her girlfriends and their  chambelanes all practiced for months before the event. Now those are some dedicated friends! Ruth selected the theme from "Howl's Moving Castle" by Joe Hisaishi as the song, and they performed the waltz beautifully, choreographed by my mom.


And to make it even more fun, they changed into street clothes and matching baseball tees to perform a medley of hip hop and dance songs to kick off the dancing part of the night. They should form a dancing group, really. All that work for just one night--but they didn't seem to care!


Another similarity a Quinceañera has with a wedding reception is the traditional father-daughter dance, and this one was especially tender. It reminded me of my own Quinceañera exactly ten years earlier. No wonder my dad got a little choked up during the dance; he probably couldn't believe his youngest girl is a young woman now! I still have trouble believing it...


I can't leave out our wonderful mother, Julia. She's our model, our hero! We love her to bits and I could see how proud she was of Ruth and the beautiful, talented, kind woman she's become.

Let's do a complete one-eighty and see the last few pictures of the set up. Some fun photobooth poses:


I looked and looked, and it seems like this is the only picture that shows even a part of the table set up. How could I forget to take a picture of that? In the background you can see the candy bar table, as small and blurry as it is.


One more of the guests under the "tent" and the table set up:


That's it! The night went without a hitch and everyone went home happy. We are so grateful to our guests, our family and everyone who helped in any way. It was a history-making Quinceañera  for sure and one we'll not forget.

2.12.2012

Rewind: Carnival Quinceañera.

 Hi! Franco and I just moved our "offices" into the living room, so now we're back to back while he's on his computer studying and I'm on the computer...working. Being in the spacey living room (closer to the kitchen) is so much better for my work ethic. I felt so isolated with my desk in the bedroom that I would often have no desire to work in that "cave"! Well, it wasn't so bad. But I have been more productive now that I moved.

I've been able to do a lot of things with my graphic design which I'll be sharing both here and on my design blog. First up is a rewind to last summer (yes, summer 2011) to catch up on all of the fun, parties, and events we were a part of. I've been editing and cataloging hundreds of pictures, some of which include tutorials and how-tos, so I hope it'll be fun and helpful for you, too!
--------------------------------------------------------
Rewind: Carnival Quinceañera, Part 1
July 1, 2011

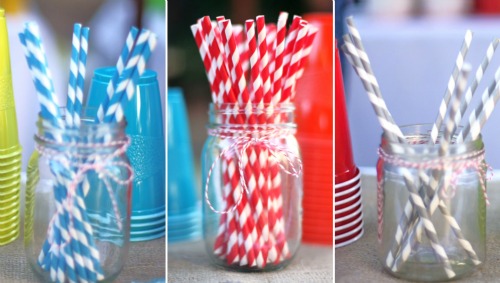
First in the series is my sister Ruth's awesome Carnival-themed Quinceañera. A Quinceañera is a traditional coming-of-age party mostly celebrated in Latin and Catholic cultures when a young woman turns fifteen. We're not Catholic, but we do love parties! My sister turned fifteen last year and decided to put a twist on the traditional Quinceañera (which seriously, can be like a mini-wedding--fancy white dress, big salon, delicious food, expensive tableware--and sometimes ends up costing as much as one!) and instead played up her creative personality and planned a Carnival Quinceañera. We were living with my parents at the time, so I got to be a part of the planning process. It was so fun finally putting to use some iconic party ideas floating around the web like striped straws, little paper flag cupcake-toppers and a candy bar. I will share all of the decorations we made first, and in the next post I'll share some pictures of the event. Enjoy!
My lovely sister, Ruth Airi Zurcher.
The "Welcome to the Carnival" signs were made of printed cardstock mounted on cardboard and taped to a wooden rectangle we found in the backyard, painted white. I designed the signs in Adobe Illustrator. I have the files, if anyone would like to use them.

The cupcake flags were made of scrapbook paper triangles glued to toothpicks. Cheap. Fast. Easy.

We had a photobooth! My dad had a soccer goal made out of pvc pipe so it was the perfect height and length for it. We pinned a few yards of red and white polka-dotted fabric to it, bought at a great little fabric store in Oxnard for $2 a yard, posted a "Photobooth" sign (downloaded from the pretty blog), and had some props ready--voila! To make the chalkboard talk bubbles, I used this how-to from Oh Happy Day!. I use Jordan's blog as a resource for everything, as you'll come to find out. I bought some chalkboard adhesive paper, stuck it to black foam board, and cut out shapes with an exacto-knife. I wish I had appointed someone else to take the pictures because it wasn't as successful as it could have been. I was running around doing a million other things and trying to enjoy the party,too! But it looked good!
The "Carnival" sign hung over the patio/dance floor. I designed it in Illustrator and printed it onto banner paper. I love the colors! So festive.

I love this tutorial by Dana from MADE for ruffled crepe paper garlands. I'm all for making inexpensive party decorations look like a million bucks! And I've used them for a few other events, so they were worth the time to make

I'll show how the tables looked in the next post, but basically it was a round table covered with a white tablecloth with a square navy-and-white-striped fabric table runner in the center. A square piece of burlap lay on top, and a red bucket full of peanuts and candy finished the rustic look.
 
Stripey straws from Garnish!
A friend let us borrow an authentic popcorn machine which was manned by a few of Ruth's closest friends, and it was a big hit! They scooped the air-popped popcorn into cute little bags we made. I had wanted to do something similar to Oh Happy Day!'s purple picnic, but the white paper bags were too thick for my printer. I instead printed the design on white computer paper and cut/glued them on each bag. It was a labor of love.
 
More decorations: real and fake trees lined with twinkling lights and lots of colorful balloons.

I only have one picture of part of the candy/cupcake bar under the "tent." We set up a blue canopy in the middle of the yard and then hung long pieces of sheer fabric from each corner to the outer edges of the perimeter (found at the L.A. fabric district for $1 a yard) to mimic a colorful circus tent. It provided shade and dimension to the large grassy area where guests sat and visited while they ate.
Under the canopy we placed a round table and on top we set out jars and buckets filled with tootsie rolls, animal crackers, gumballs, twizzlers, sour straws, Dum-dums, puff mints, and the cupcakes. 

I lucked out at a little party store in Oxnard and found inexpensive clear scalloped plastic cake stands to use for the cupcakes. I think they all cost less than $10 for two big stands. The tubes joining the tops to the bottoms were hollow, so I filled them with gumballs to make them more colorful. It's all in the details, right?

The only thing I never got a picture of was the food table. We had hot dogs and sweet and sour chicken skewers, fruit, chips, and salad. This is the only picture I got of the food:
At least the fruit looked good!

Part 2 coming soon with more pictures of the tables and guests!

6.02.2011

Glitter. Not The Movie.

Over the weekend, I tried on these shoes at JCrew, even though they were about $120 more than I could pay for them. {Truthfully, they weren't even all that comfy, so I didn't feel too bad that I had to put them back on the shelf.} Franco, however, gave me the boost I needed as he saw me looking longingly at all of their shoes on display by saying, "You could totally make those." And you know what, I can. And will with this d.i.y. As soon as I can get over to Michael's to get some pretty Martha Stewart glitter. Now the question is, what color?

2.04.2011

I Love You, Deeply. {A Free Printable For You, With Love.}

Hi's! If you still need a pretty card for Valentine's day {or anniversary, birthday, just because}, maybe you'll like this one. Head to my design blog to download the pdf files, then have fun printing it out for your sweetie!


Franco is out on a scout camping trip tonight, so I'm spending the night at my parent's house. 
Hope you have a lovely weekend!

1.31.2011

Rest Your Head Close To My Heart, Never To Part, Baby Of Mine.

I had the joy of helping out with my good friend Susie's baby shower last weekend. I had the job of coming up with decorations while the other two wonderful hostesses, Jana and Emily, did the hard parts! I took inspiration from here and kind of went with it the best I could. Susie is very stylish and chic {as you can tell from the pictures} so I wanted to have a somewhat elegant flair using the bold colors magenta and black, while keeping a girly, playful quality since she's having a baby girl in March.

One of the coolest parts was the idea that Emily found for the menu: omelettes in a bag. They were delish and so simple! {side note: I'm going to show Franco how to make them because it would be an easy recipe for scout campouts throughout the year.} Definitely going to try those again.

It was fun, we enjoyed good company, and it went off without a hitch! I love when that happens.
The decorations were pretty simple:
-tissue paper poms and paper pinwheels
-damask wrapping paper and ribbon from Michael's
-crepe paper
-pink silk flowers from the dollar store and a couple branches from a tree in Emily's front yard
The pink and black banner said "It's a girl!" and it was made from the damask wrapping paper and pink fabric I already had. I found the circle letter designs somewhere and glued them on the triangles. Easy peasy.
I scored on these frame decals from the dollar bin at Michael's. I already had chalkboard paper from the dollar store, so I cut it to fit the frame and stuck it on the wall.
Don't tell Susie, but the three wooden plaques I made her cost me a whopping $4.50 at the clearance section at Target. I painted them pink and Mod Podged a design I made and printed out. I hope baby Sofia will like them!
Thanks for joining us, ladies!